

Introduction
What is FFUF?
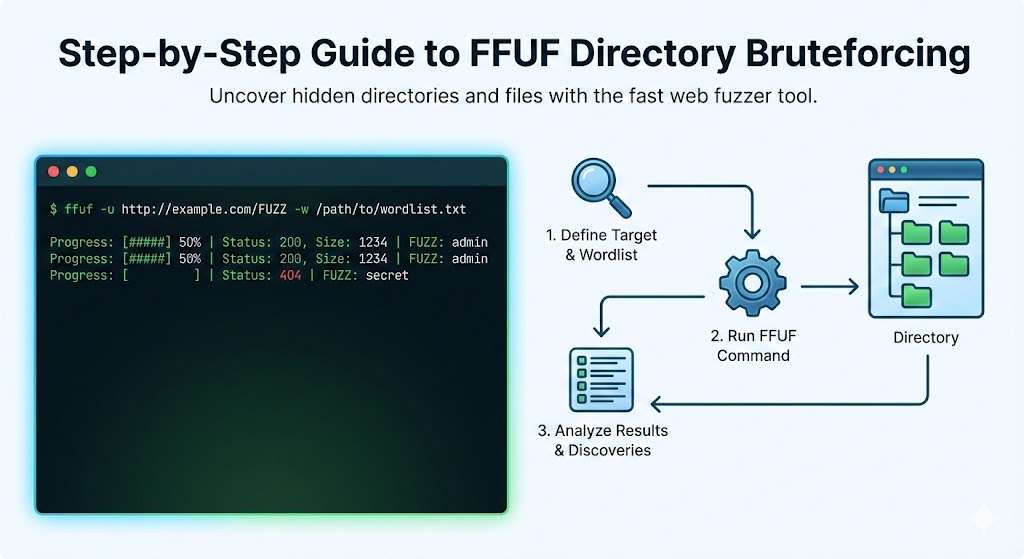
FFUF stands for Fuzz Faster U Fool. It is a web fuzzing tool. Think of it as a scanner that tries many different words and paths on a website. The tool automatically sends requests to a web server. Each request tests a different directory or file name. FFUF helps you discover hidden pages and folders that are not linked publicly.
Most websites have directories that are not visible in the navigation menu. These hidden directories might contain admin panels, backup files, or configuration settings. FFUF systematically searches for these hidden areas. It does this by using a list of common directory names. The tool tries each name one by one.
FFUF is written in Go programming language. This makes it very fast and efficient. It can test hundreds or thousands of paths in a short time. The tool works on Linux, macOS, and Windows. Security professionals use FFUF regularly in their work.
Why Directory Bruteforcing Matters in Penetration Testing
Directory bruteforcing is an important technique in security testing. When you visit a website, you usually only see what the owner wants you to see. But websites often have many more directories behind the scenes. Finding these hidden directories is like discovering secret doors in a building.
Many companies accidentally leave sensitive information in hidden folders. Examples include backup databases, old versions of files, test environments, and configuration files with credentials. These discoveries help security teams understand vulnerabilities. They can then fix these issues before attackers find them.
Penetration testing is a professional service. Companies hire security experts to test their systems. These experts look for weaknesses in websites and networks. Directory bruteforcing is one of the first steps in this process. It helps identify what is running on the web server. It shows what directories exist and what files are available.
Discovering hidden directories often leads to finding actual security problems. For example, you might find an old admin panel that still works. You might discover configuration files containing database passwords. You could find development versions of applications with fewer security protections. All of these findings help companies improve their security.
Legal and Ethical Considerations
Before using any security tool, you must understand the legal side. Using FFUF on someone else’s website without permission is illegal. It is called unauthorized access. This can result in criminal charges. It can also damage your reputation and career.
Always get written permission before scanning any website. This permission should come from the company that owns the website. The permission must clearly define what you can and cannot test. It should specify the dates you can perform testing. It should also list all the systems you are allowed to test.
There are legal ways to practice security skills. Bug bounty programs allow you to test real websites. Companies running these programs give you permission to look for vulnerabilities. You report any issues you find. The company then pays you a reward for finding the problem. Popular bug bounty platforms include HackerOne, Bugcrowd, and Intigriti.
You can also practice on intentionally vulnerable applications. Websites like DVWA (Damn Vulnerable Web Application) and WebGoat are created for learning. They have known vulnerabilities built in. You can legally practice on these systems without any risk.
Prerequisites and Required Knowledge
Before starting with FFUF, you should have some basic knowledge. First, you should understand how the internet works. You should know what a web server is. You should understand what a URL is and how it works. You should know that websites have folders and files just like your computer does.
You need basic command line experience. The command line is a text-based interface for your computer. Instead of clicking buttons, you type commands. FFUF runs from the command line. If you have never used a command line before, you should practice first. Learning basic commands like “cd”, “ls”, and “mkdir” will help you. I have already written an article on Networking Essentials.
Understanding HTTP is important. HTTP is the protocol that websites use. When you visit a website, your browser sends an HTTP request. The server sends back an HTTP response. FFUF sends many HTTP requests. Understanding status codes like 200, 404, and 403 helps you interpret results.
You should also understand basic web application structure. Most websites follow common patterns. They have folders like “/admin”, “/api”, “/uploads”, and “/config”. Knowing these patterns helps you guess what directories might exist. This knowledge helps you choose the right wordlists when scanning.
Basic networking knowledge is helpful but not required. You should know what an IP address is. You should understand what a domain name is. You should know how DNS works. These concepts help you understand how FFUF connects to target websites.
Target Audience and Learning Objectives
This guide is written for ethical hackers who are just starting out. If you have already used other security tools, learning FFUF will be easier for you. However, we explain everything from the beginning. Even complete beginners can follow this guide. You do not need to be a programmer to use FFUF effectively.
This guide is also useful for security professionals who want to learn a new tool. If you have experience with other directory bruteforcing tools like Dirb or Dirbuster, FFUF will seem familiar. You will learn how to work faster and more efficiently with FFUF.
After reading this guide, you will understand several key concepts. You will know how to install FFUF on your computer. You will learn how to run basic scans. You will understand how to interpret the results. You will learn advanced techniques like filtering and custom wordlists. You will understand how to avoid detection when scanning. You will know how to use FFUF in real penetration tests.
You will learn how to use wordlists effectively. Wordlists are the heart of FFUF. They contain all the directory and file names that FFUF tries. Learning to choose or create the right wordlist is crucial. You will learn where to find good wordlists. You will learn when to create custom wordlists.
You will practice with real examples in this guide. Each example builds on the previous one. We start with very simple scans. We gradually move to more complex scenarios. By the end, you will be able to handle real penetration testing jobs. You will understand how to discover hidden admin panels. You will know how to find backup files. You will learn how to discover API endpoints.
Table of Contents
- Introduction
- FFUF Installation and Setup
- FFUF Basics and Command Structure
- Your First FFUF Scan: Basic Directory Enumeration
- Finding and Preparing Wordlists
- Creating a Simple Wordlist
- Choosing Your First Wordlist
- Crafting Your First Command
- Understanding FFUF Output
- Interpreting Status Codes (200, 301, 302, 403, 404)
- Identifying True Positives vs. False Positives
- Analyzing Results from Your First Scan
- Common Beginner Mistakes and How to Avoid Them
- Advanced FFUF Filtering Techniques
- Evading Detection and Staying Stealthy
- Troubleshooting Common Issues
- Conclusion
FFUF Installation and Setup
System Requirements
FFUF runs on most modern computers. You need at least 2 GB of RAM. A standard processor works fine. Internet connection is required for downloading. Storage space needed is about 50 MB. It works on 64-bit systems only.
Linux, macOS, and Windows are all supported. No special graphics card is needed. FFUF uses very little power. You can run it on a laptop or virtual machine. Kali Linux is popular for security work. Regular Ubuntu also works well.
Check your system first. Open terminal on Linux or macOS. Type “uname -m” to see if it’s 64-bit. On Windows, check system info. FFUF needs Go language version 1.16 or newer if building from source.
Installing FFUF on Linux (Ubuntu/Debian)
Open your terminal. Update package lists first. Type this command:
sudo apt updateInstall Go language if not present:
sudo apt install golang-goDownload FFUF binary. Go to GitHub releases page. Find the latest version. Copy Linux AMD64 link. Use wget to download:
wget https://github.com/ffuf/ffuf/releases/download/v2.1.0/ffuf_2.1.0_linux_amd64.tar.gzOr get the link from here: https://github.com/ffuf/ffuf/releases
Unpack the file:
tar -xzf ffuf_2.1.0_linux_amd64.tar.gzMove binary to system path:
sudo mv ffuf /usr/local/bin/Test it works. Type “ffuf -V”. You see version number.
For Kali Linux, use package manager:
sudo apt install ffufThis method is fastest. Binary method gives latest version.
Installing FFUF on macOS
Use Homebrew package manager. Install Homebrew first if missing. Open Terminal. Paste this:
/bin/bash -c "$(curl -fsSL https://raw.githubusercontent.com/Homebrew/install/HEAD/install.sh)"Install FFUF:
brew install ffufHomebrew handles updates automatically. Binary stays in path.
Manual method works too. Download macOS AMD64 binary from GitHub. Use wget or curl:
curl -L https://github.com/ffuf/ffuf/releases/download/v2.1.0/ffuf_2.1.0_darwin_amd64.tar.gz -o ffuf.tar.gzUnpack:
tar -xzf ffuf.tar.gzMove to path:
sudo mv ffuf /usr/local/bin/Apple Silicon (M1/M2) needs ARM64 version. Check GitHub for correct binary.
Installing FFUF on Windows
Download Windows binary from GitHub. Go to releases page. Get ffuf_v2.1.0_windows_amd64.zip.
Extract ZIP file. Use File Explorer or 7-Zip.
Rename ffuf.exe to ffuf. Move to C:\Windows\System32 folder. Or add folder to PATH.
Open Command Prompt. Test with:
ffuf -VPowerShell works too. Same commands apply.
Use Windows Subsystem for Linux (WSL). Install Ubuntu in WSL. Follow Linux steps. WSL gives Linux experience on Windows.
Chocolatey package manager option:
choco install ffufVerifying Installation and Version Checking
Test FFUF works. Open terminal or Command Prompt. Type:
ffuf -VYou see output like: “ffuf version: 2.1.0”. Success means ready to use.
Run help command:
ffuf -hShows all options. Scroll to see syntax.
Test basic scan. Create test file:
echo "test" > wordlist.txtRun:
ffuf -u https://httpbin.org/get -w wordlist.txt -H "User-Agent: test"See requests work. Stop with Ctrl+C.
Check file permissions on Linux/macOS:
ls -la /usr/local/bin/ffufMust show execute permission.
Updating FFUF to the Latest Version
Check current version first: ffuf -V.
Visit GitHub releases. Note newest version number.
Download new binary. Delete old one:
sudo rm /usr/local/bin/ffufDownload and move new binary. Same steps as install.
Homebrew auto-updates:
brew upgrade ffufChocolatey:
choco upgrade ffufBinary method always gets latest. Release notes show new features.
After update, test again: ffuf -V. Restart terminal if needed.
FFUF Basics and Command Structure
Understanding FFUF Syntax
FFUF works from the command line. You type commands to tell it what to do. Every command starts with “ffuf“. Then you add options and parameters.
The basic format is simple. Type “ffuf” followed by a space. Then add a flag. Flags start with a dash. After the flag comes a value. Example: ffuf -u https://example.com/FUZZ.
The FUZZ keyword is very important. It marks where FFUF should try different words. You replace directory names or file names with FUZZ. FFUF substitutes each word from your list into that position. Every request tries a different word.
Multiple flags can work together. They tell FFUF what to do. The order usually doesn’t matter. Some flags need values. Others don’t. Optional flags have square brackets in help. Required flags don’t have brackets.
Flags can use short form or long form. Short form uses one dash and one letter. Example: -u for URL. Long form uses two dashes and full word. Example: –url. Both work the same way.
Values with spaces need quotes. Put them in double quotes. Example: “my test value“. Files and paths work without quotes usually.
Comments in commands help remember what they do. Use hash symbol. Example: # This scans for admin pages. Comments don’t affect the command.
Essential Command-Line Arguments
The URL flag is most important. Use -u or –url. Put your target website URL here. Mark where FUZZ should go. Example: ffuf -u https://example.com/FUZZ. FFUF replaces FUZZ with each word.
The wordlist flag loads your word list. Use -w or –wordlist. Point to your word list file. Example: ffuf -u https://example.com/FUZZ -w /path/to/wordlist.txt. FFUF reads words from this file.
Multiple wordlists work together. Use multiple -w flags. Example: -w list1.txt -w list2.txt. FFUF tries combinations. Useful for advanced fuzzing.
The request method flag sets HTTP method. Use -X or –request. Default is GET. Can be POST, PUT, DELETE, etc. Example: -X POST.
Header flag adds custom headers. Use -H or –header. Example: -H “User-Agent: Mozilla/5.0”. Can add multiple headers. Use multiple -H flags.
Cookie flag adds cookies to requests. Use -b or –cookie. Example: -b “session=abc123”. Useful for authenticated scanning.
Delay flag adds pause between requests. Use -d or –delay. Measured in seconds. Example: -d 0.5 adds half second delay. Helps avoid detection.
Timeout flag sets request timeout. Use -t or –timeout. Measured in seconds. Default is 10. Example: -t 20 waits 20 seconds.
Input and Output Options
The data flag sends POST data. Use -d or –data. Example: -d “username=test&password=test”. Useful for fuzzing form fields.
Output file flag saves results. Use -o or –output. Example: -o results.txt. Saves findings to file. Useful for large scans.
Output format flag changes result format. Use –of or –outputformat. Options are “json”, “csv”, “html”. Example: -of json. JSON works best for parsing.
Verbose flag shows detailed information. Use -v or –verbose. Shows every request sent. Helpful for debugging. Creates lots of output.
Silent flag removes most output. Use -s or –silent. Only shows final results. Makes output cleaner. Good for quick checks.
Color output flag controls colors. Use -c or –color. On or off. Helps readability in terminal.
Recursion flag goes into subdirectories. Use -recursion or -r. Adds depth limit. Example: -recursion -recursion-depth 2. Finds nested directories.
Filter and Match Options
Status code matching narrows results. Use -mc or –match-code. Example: -mc 200,301,302. Shows only these status codes. Hides others. Default is 200.
Status code filtering hides unwanted codes. Use -fc or –filter-code. Example: -fc 404. Hides 404 responses. Reduces noise.
Response size filtering removes false positives. Use -fs or –filter-size. Example: -fs 0. Hides responses with zero size. Shows only meaningful results.
Word count filtering is useful. Use -fw or –filter-words. Example: -fw 100. Hides responses with 100 words. Filters out error pages.
Line count filtering works similarly. Use -fl or –filter-lines. Example: -fl 50. Hides responses with 50 lines.
Regular expression matching is powerful. Use -mr or –match-regex. Example: -mr “admin|login”. Shows only pages containing these words.
Regular expression filtering hides matches. Use -fr or –filter-regex. Example: -fr “error|not found”. Hides pages with these words.
Time delay filtering finds slow pages. Use -ft or –filter-time. Measured in seconds. Example: -ft 5. Hides responses slower than 5 seconds.
Combinations work together. Use multiple filters. Example: -fc 404 -fs 0 -fw 50. Creates precise filtering.
Threading and Performance Settings
Thread count flag sets speed. Use -t or –threads. Example: -t 50. Sends 50 requests simultaneously. Default is 40. Higher number means faster scanning.
Too many threads cause problems. Server might block you. Network gets overwhelmed. Start with 50. Increase slowly.
Rate limit flag controls request speed. Use -rate or –rate. Example: -rate 10. Sends 10 requests per second. Slower than threading. Better for avoiding detection.
Proxy flag routes traffic through proxy. Use -p or –proxy. Example: -p http://127.0.0.1:8080. Useful with Burp Suite. Helps bypass filters.
Max time flag limits total scan duration. Use -maxtime or –maxtime. Measured in seconds. Example: -maxtime 300. Stops after 5 minutes.
Timeout flag was mentioned earlier. Controls individual request timeout. Example: -timeout 10. Waits 10 seconds per request. Stops waiting after this.
Random delay adds variation. Use -rd or –randomdelay. Example: -rd 0-2. Adds 0 to 2 seconds random delay. Makes patterns less obvious.
Connection limit flag controls simultaneous connections. Use -conn or –conn. Example: -conn 100. Prevents overwhelming server.
Getting Help: FFUF Documentation
The help flag shows all options. Type ffuf -h or ffuf –help. Shows every flag available. Shows syntax for each. Essential reference.\


Help is long. Pipe to “less” to scroll. Type: ffuf -h | less. Use arrow keys to scroll. Type “q” to quit.
Search help for specific flag. Use grep. Type: ffuf -h | grep “match”. Shows only lines containing “match”.
Official GitHub has documentation. Visit: https://github.com/ffuf/ffuf. Contains examples and guide. Answers detailed questions.
Wiki section on GitHub has tutorials. Covers common scenarios. Shows real examples. Very helpful for learning.
Man page works on Linux. Type man ffuf. Shows formatted help. More readable than -h output.
Examples come with FFUF. Check GitHub examples folder. Contains real scanning scenarios. Copy and adapt them.
GitHub issues section has Q&A. Search your question. Likely someone asked before. Solutions already posted.
Community forums discuss FFUF. Reddit has cybersecurity subreddits. Stack Exchange has security tag. Ask questions there.
Experiment and practice. Run commands locally. See what each flag does. Best way to learn.
Your First FFUF Scan: Basic Directory Enumeration
Finding and Preparing Wordlists
Before scanning, you need a wordlist. This is a text file containing directory names to test. Each line has one word. FFUF tries each word against your target.
- Wordlists on Kali Linux
Kali Linux includes many wordlists by default. They are in the /usr/share/wordlists directory. Open terminal and type: ls /usr/share/wordlists. You see several folders.
The dirb folder contains common directory lists. The dirbuster folder has more comprehensive lists. The wfuzz folder includes fuzzing wordlists. The seclists folder is the most popular. It has many categories.
SecLists is the best choice for beginners. Navigate to it: cd /usr/share/wordlists/seclists/Discovery/Web-Content. List files: ls. You see many wordlists. common.txt is good for first scans. big.txt is larger. directory-list-2.3-big.txt is very comprehensive.
You can copy a wordlist to your working directory. Type: cp /usr/share/wordlists/seclists/Discovery/Web-Content/common.txt ~/. This puts it in your home folder. Now you can use it easily. - Wordlists on Windows and macOS
Windows and macOS don’t include security wordlists. You need to download them manually. The SecLists project on GitHub is the best source.
Visit: https://github.com/danielmiessler/SecLists. Click the green “Code” button. Choose “Download ZIP“. Extract the ZIP file. Navigate to Discovery > Web-Content. Find common.txt.
Or use command line on macOS. Open terminal. Install git: brew install git. Then clone the repository: git clone https://github.com/danielmiessler/SecLists.git. This downloads all wordlists.
On Windows, install Git for Windows. Then use Git Bash. Run the same git clone command.
Creating a Simple Wordlist
You can create your own wordlist easily. Open a text editor. Notepad works on Windows. TextEdit works on macOS. Create a new file. Write common directory names. Each on its own line. Start with basics:
- text
- admin
- login
- wp-admin
- wp-content
- uploads
- images
- css
- js
- backup
- config
Save the file as mylist.txt. Keep it small for first tests. Ten to twenty words is enough.
You can also generate wordlists from websites. Use Google search results. Copy directory names you see. Add them to your list. This creates targeted wordlists.
Choosing Your First Wordlist
For your first scan, use a small wordlist. common.txt from SecLists is perfect. It has about 4700 words. Not too big, not too small. It finds most common directories.
Avoid big.txt or directory-list-2.3-big.txt for first scans. They have hundreds of thousands of words. They take hours to run. They are better for advanced users.
Create a test wordlist with just 5-10 words. This lets you see FFUF work quickly. You can verify setup works.
Crafting Your First Command
Now you will run your first FFUF scan. Open terminal or Command Prompt. Make sure FFUF is installed. Test with ffuf -V.
Choose a target website. For practice, use a test site like httpbin.org. This site is made for testing. It is safe and legal.
Create a simple wordlist first. Use the small one you made. Or download common.txt. Know the full path to your wordlist.
Type your first command:
ffuf -u https://httpbin.org/FUZZ -w mylist.txtPress Enter. FFUF starts working. You see output appearing line by line

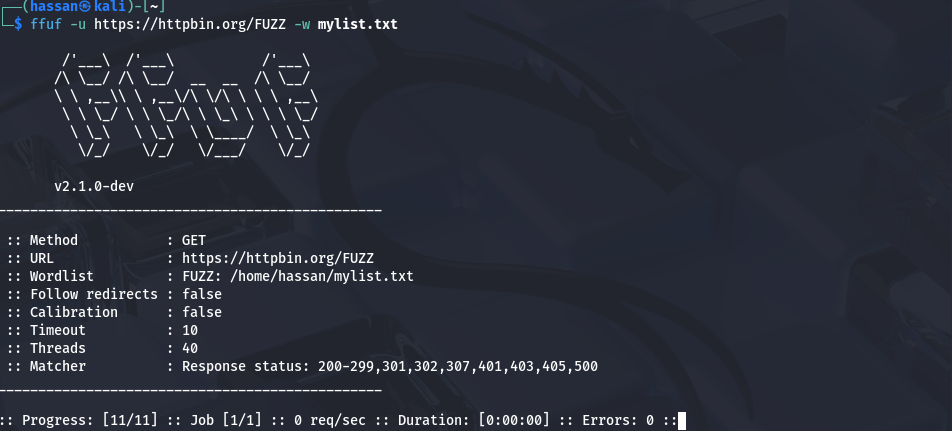
The -u flag sets the URL. The FUZZ keyword marks where words go. The -w flag loads your wordlist. FFUF replaces FUZZ with each word.
Wait for the scan to finish. It takes seconds with a small list. You see results appearing in real-time.
Understanding FFUF Output
FFUF shows live results as it scans. Each line represents one request. The output has several columns.
The first column shows the word being tested. This comes from your wordlist. Next column shows HTTP status code. This tells if the directory exists.
Next columns show response size, word count, and line count. These help identify false positives. The last column shows time taken for that request.
Normal output looks like this:
| admin | [Status: 404, Size: 0, Words: 1, Lines: 1] |
| css | [Status: 200, Size: 1250, Words: 45, Lines: 23] |
| js | [Status: 200, Size: 890, Words: 32, Lines: 18] |
Status 404 means “not found”. Status 200 means “found”. Size shows how big the response is. Words and lines count content elements.
The progress bar shows at bottom. It displays percentage complete. Shows requests per second. Shows estimated time remaining.
Interpreting Status Codes (200, 301, 302, 403, 404)
Status codes tell you what happened with each request. Understanding them is crucial.
- 200 OK means success. The directory or file exists. The server returned content. This is a positive finding. Investigate these results first.
- 301 Moved Permanently means redirect. The resource moved to new location. FFUF shows the new location. These often indicate directories exist but redirect elsewhere.
- 302 Found means temporary redirect. Similar to 301 but temporary. Also indicates something exists. Worth checking where it redirects.
- 403 Forbidden means access denied. The directory exists but you cannot access it. This is still valuable information. It tells you something is there. Might be admin panel or sensitive area.
- 404 Not Found means the resource doesn’t exist. Most of your results will be 404. This is normal. FFUF filters these out by default.
- 500 Internal Server Error means server had problem. Could indicate interesting behavior. Sometimes happens with special characters. Worth investigating.
- 401 Unauthorized means authentication required. The resource exists but needs login. Could be admin area or protected section.
- 400 Bad Request means invalid request. Might indicate input validation issues. Could be interesting for further testing.
You can read more about the Networking Essentials here.
Identifying True Positives vs. False Positives
- True positives are real directories and files. False positives seem real but aren’t. Learning to tell them apart saves time.
- Response size is the best indicator. Most 404 pages have same size. Look for responses with different sizes. These are likely real.
- Compare sizes. If most results show Size: 0 or same number, those are false positives. When you see a different size, investigate that word.
- Word count and line count help too. Error pages often have same word count. Real pages vary more. Look for different numbers in these columns.
- Status 200 always means something exists. But sometimes it shows default page. Check if the size matches homepage. If yes, it might be false positive.
- Custom 404 pages return status 200. But they say “Page Not Found”. These have unique size. Note this size. Filter it out next time.
- 403 responses often mean directories exist. Even if you cannot access them, they are real. Add these to your target list for further testing.
- Redirect responses (301, 302) usually indicate real resources. Check where they redirect. Might lead to login pages or moved content.
Analyzing Results from Your First Scan
- After scan finishes, review results carefully. FFUF shows summary at end. It lists total requests, duration, and requests per second.
- Start with status 200 results. These are confirmed pages. Open each in browser. See what they contain. Look for interesting information.
- Check status 403 results. These are denied directories. Try to access them manually. See if there is a way in. They might be admin areas.
- Look at status 301 and 302 results. Note redirect locations. Follow them in browser. See where they lead.
- Sort results by size. Find the largest responses. These often contain more content. Might be admin panels or dashboards.
- Create a list of interesting findings. Write down URLs that look important. Mark which ones need more investigation. Share this list with your team.
- Export results to file. Use -o results.txt. Review later. Use in reports. Share with clients.
- Compare results across multiple scans. Run scan again with different wordlist. See what new directories appear. This builds complete picture.
Common Beginner Mistakes and How to Avoid Them
- Wrong URL format is common. Always include http:// or https://. Without it, FFUF fails. Check URL twice before running.
- Missing FUZZ keyword causes errors. FFUF needs FUZZ to know where to substitute words. Put it in URL path. Example: https://example.com/FUZZ.
- Wordlist not found happens often. Provide full path to wordlist. Use absolute paths like /home/user/wordlist.txt. Or run from directory containing wordlist.
- Too many threads crashes scans. Default is 40. That’s good for start. Don’t increase to 500 immediately. Server might block you.
- Ignoring filters creates noise. Use status code filters. Example: -fc 404 removes not found results. Output becomes cleaner. Focus on real findings.
- Scanning without permission is illegal. Always get authorization. Written permission protects you. Never scan random websites.
- Using huge wordlists first wastes time. Start small. Use 100-1000 words. Big lists take hours. Small lists give quick results.
- Not saving results loses findings. Always use -o flag. Save to file. Review later. Share with team.
- Forgetting proxy settings misses traffic. If using Burp Suite, add -p http://127.0.0.1:8080. See requests in proxy. Understand what’s happening.
- Bad wordlist choice limits findings. Use updated wordlists. Old lists miss new directories. SecLists is regularly updated. Use it.
- Quitting too early misses results. Let scan finish completely. Canceling halfway loses potential findings. Be patient.
Advanced FFUF Filtering Techniques
Filtering by HTTP Status Codes
Status code filtering is the most common advanced technique. It removes unwanted responses from results. This makes output cleaner and easier to read.
The filter code flag is -fc or –filter-code. It hides specific status codes. Example: ffuf -u https://example.com/FUZZ -w wordlist.txt -fc 404. This hides all 404 responses.
Most websites return 404 for missing pages. These clutter your results. Filtering 404 removes noise. You see only real findings.
Filter multiple codes at once. Separate with commas. Example: -fc 404,400,403. This hides three status codes. Output becomes very clean.
The opposite is match code. Use -mc or –match-code. It shows only specific status codes. Example: -mc 200,301,302. Shows only these codes. Hides everything else.
Match is useful when you want one type. Example: -mc 200 shows only successful pages. Perfect for finding real content.
Combine matching and filtering for precision. Example: -mc 200,301 -fc 404. Shows only 200 and 301 responses. Hides 404. Creates focused output.
Try different combinations. Some websites use 403 for hidden pages. Others use 500 for errors. Experiment to find what works for your target.
Default behavior shows status 200 only. Adding flags changes this. Read output carefully. Understand which codes mean what for your target.
Filtering by Response Size
Response size filtering removes false positives. Many 404 pages have identical size. Real pages have different sizes.
The filter size flag is -fs or –filter-size. Example: -fs 1234. Hides responses exactly 1234 bytes. Removes false positives with that size.
Find the size of error pages first. Run scan without filters. Look at common sizes. Notice most 404 responses have same size.
Example output might show:
| page1 | [Status: 404, Size: 156, Words: 10, Lines: 5] |
| page2 | [Status: 404, Size: 156, Words: 10, Lines: 5] |
| admin | [Status: 404, Size: 156, Words: 10, Lines: 5] |
| config | [Status: 200, Size: 2048, Words: 100, Lines: 45] |
Notice 404 responses all show Size: 156. Real response shows Size: 2048. Use -fs 156 to hide error pages.
Filter multiple sizes at once. Separate with commas. Example: -fs 156,512,1024. Removes three common sizes. Useful when target has multiple error pages.
Match specific size instead. Use -ms or –match-size. Example: -ms 2048. Shows only responses exactly 2048 bytes. Hides all others.
Combine with status code filters. Example: -fc 404 -fs 156. This hides 404 responses and responses 156 bytes. Extra clean output.
Size filtering works best with custom error pages. Some sites return 200 status but error message. Size differs from real pages. Filtering hides them.
Test filters before large scans. Run with small wordlist. See which sizes are false positives. Then run full scan with filters.
Filtering by Word Count
Word count is the number of words in response. Error pages have predictable word counts. Real pages vary more.
The filter words flag is -fw or –filter-words. Example: -fw 50. Hides responses with exactly 50 words. Removes pages with that count.
Find error page word count first. Run test scan. Look at word counts. Most error pages have similar counts.
Real pages vary. Admin pages have different word counts. API responses vary. Filtered output shows variety.
Filter multiple word counts. Separate with commas. Example: -fw 50,75,100. Removes three word counts. Very specific filtering.
Match word count instead. Use -mw or –match-words. Example: -mw 100. Shows only 100-word responses. Hides all others.
Combine with other filters. Example: -fw 50 -fc 404. Hides error pages by word count and status. Double filtering.
Large word counts suggest real content. Error pages usually short. Responses with 200+ words often real. Worth investigating.
Small word counts suggest errors. Blank pages have zero words. Error messages have few words. Real pages usually longer.
Use word count for API fuzzing. API responses predictable. Error responses have standard format. Real responses vary. Word count filtering helps find real APIs.
Filtering by Line Count
Line count is number of lines in response. Different from word count. Lines count by line breaks.
The filter lines flag is -fl or –filter-lines. Example: -fl 25. Hides responses with exactly 25 lines.
HTML pages have many lines. Error pages fewer lines. Filtering removes predictable error responses.
Find error page line counts first. Run test scan. Look at line counts. Pattern emerges quickly.
API responses have few lines. Often single line JSON. Real API responses vary. But error responses consistent.
Filter multiple line counts. Separate with commas. Example: -fl 10,25,50. Removes three line counts.
Match lines instead. Use -ml or –match-lines. Example: -ml 100. Shows only 100-line responses.
Combine filters. Example: -fw 50 -fl 25. Removes by word and line count. Very precise filtering.
Line count useful for structured data. JSON responses have predictable lines. XML responses too. Real responses have varied lines.
Combining Multiple Filters
Combining filters creates very clean results. Use multiple flags together. Each narrows output more.
Example complex filter:
ffuf -u https://example.com/FUZZ -w wordlist.txt -fc 404 -fs 156 -fw 50
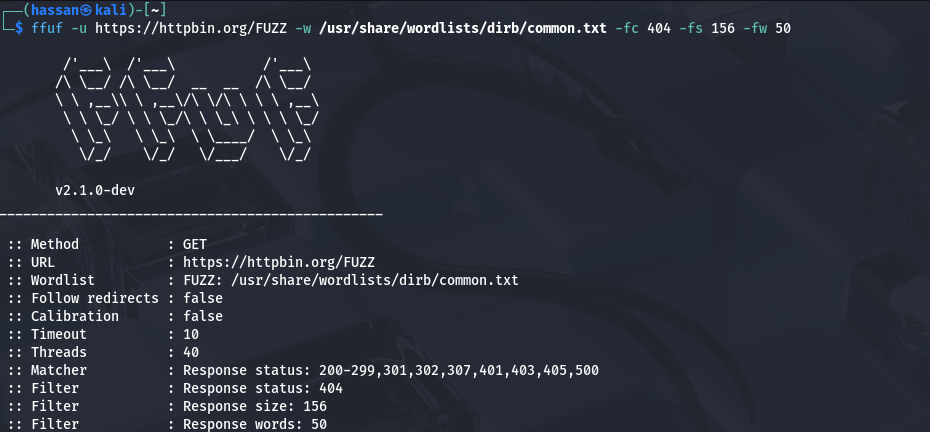
This command:
- Hides 404 status codes
- Hides responses 156 bytes
- Hides responses 50 words
Result shows only real pages. Output is very focused.
Order doesn’t matter. Put filters in any order. They all apply simultaneously.
Start with status code filter. Then add size. Then add word count. Add each filter one at a time. Test after each. Make sure good results.
Too many filters might hide real findings. Test carefully. Run without filters first. See what results exist. Then add filters to clean noise.
Some websites use custom filters. Experiment. Try different combinations. Learn what works for each target.
Save successful filter combinations. Write them down. Reuse for similar targets. Create templates for common scenarios.
Test filters on small wordlist first. Run with 100 words. See results. Add filters. Make sure they work. Then run full scan with filters.
Matching Specific Responses
Matching shows only what you want. Different from filtering. Filters hide things. Matching shows things.
Match status code. Use -mc or –match-code. Example: -mc 200,301. Shows only these codes. Hides all others.
Match size. Use -ms or –match-size. Example: -ms 2048. Shows only 2048 byte responses.
Match words. Use -mw or –match-words. Example: -mw 100. Shows only 100-word responses.
Match lines. Use -ml or –match-lines. Example: -ml 45. Shows only 45-line responses.
Combine matches. Example: -mc 200 -mw 100. Shows only 200 status AND 100 words. Very specific.
Matching useful for targeted searches. Looking for admin pages. They likely 200 status. Use -mc 200. Narrows focus.
Looking for API endpoints. They might redirect. Use -mc 301,302. Shows redirects.
Matching and filtering work together. Match what you want. Filter what you don’t. Creates perfect output.
Default behavior matches 200 status. Adding match flag changes this. Read documentation. Understand defaults for your version.
Matching opposite of filtering. Use either, not both, for same criteria. Example: don’t use -mc 200 and -fc 404 together. Use one or other.
Regular Expression Filtering
Regular expressions (regex) are powerful pattern matching. They find complex patterns. Useful for advanced filtering.
Match regex. Use -mr or –match-regex. Example: -mr “admin|login”. Shows responses containing “admin” or “login”.
The pipe symbol means “or“. “admin|login” means admin OR login. Shows responses with either word.
Filter regex. Use -fr or –filter-regex. Example: -fr “error|not found”. Hides responses with these words.
Combine matches. Example: -mr “admin.*panel”. Shows “admin” followed eventually by “panel“. Dot means any character. Asterisk means repeat.
Simple regex patterns work. Complex patterns powerful but risky. Start simple. Add complexity slowly.
Common regex patterns:
- . matches any character
- * repeats previous character
- + repeats one or more times
- ? optional character
- | means OR
- ^ starts with
- $ ends with
- [abc] matches a, b, or c
- [^abc] doesn’t match a, b, or c
Example patterns:
- -mr “^admin” – starts with “admin”
- -mr “api$” – ends with “api”
- -mr “[0-9]+” – contains numbers
- -fr “ERROR.*404” – contains ERROR and 404
Test regex patterns carefully. Wrong pattern breaks scanning. Start simple. Test small wordlist. Verify output. Then run full scan.
Use regex for response body filtering. Look for specific text in responses. Example: -mr “SQL” finds SQL-related pages. Useful for vulnerability hunting.
Combine regex with other filters. Example: -mc 200 -mr “admin”. Shows 200 status AND admin in response. Very specific targeting.
Regex matching case-sensitive by default. “Admin” different from “admin”. Test both if needed.
Use online regex testers. Test patterns before using in FFUF. Websites like regex101.com help. Build confidence before scanning.
Regex powerful but slow. Might increase scan time. Use when necessary. Simple filters faster.
Evading Detection and Staying Stealthy
Understanding Web Application Firewalls (WAF)
Web Application Firewalls (WAF) protect websites. They detect scanning activity. They block suspicious requests. Understanding WAF helps you stay undetected.
WAF looks for patterns. Many requests from same IP triggers alerts. Rapid requests seem like attack. Unusual user agents look suspicious. WAF blocks these activities.
Some websites use ModSecurity. Others use CloudFlare. Each has different detection methods. Learning their patterns helps you avoid them.
Rotating User Agents
User Agent identifies your browser. Default FFUF user agent looks suspicious. WAF recognizes it as scanning tool. Change user agent to hide this.
Use -H flag to add headers. Example: -H “User-Agent: Mozilla/5.0”. This looks like real browser. Not obvious scanner.
Rotate multiple user agents. Use different ones per scan. Example:
-H "User-Agent: Mozilla/5.0 (Windows NT 10.0; Win64; x64)"-H "User-Agent: Mozilla/5.0 (Macintosh; Intel Mac OS X 10_15_7)"Different user agents avoid pattern detection. WAF sees varied browsers. Thinks legitimate traffic.
Adjusting Request Rate and Timing
Fast scanning triggers alarms. Send hundreds requests per second. WAF notices immediately. Blocks your IP.
Reduce thread count. Use -t 10 instead of default 40. Sends fewer requests simultaneously. Slower but stealthier.
Add delays between requests. Use -d 0.5 for half second delay. Between each request. Slows down scan. Looks more natural.
Random delays help more. Use -rd 0-2 for random 0-2 second delays. Unpredictable pattern harder to detect. WAF struggles to block.
Using Proxies and Proxy Chains
Proxies hide your real IP. WAF sees proxy IP instead. Harder to block your actual connection.
Use -p http://127.0.0.1:8080 for local proxy. Routes through Burp Suite. See all requests. Understand what’s happening.
Use VPN or rotating proxies. Changes IP for each request. WAF sees different sources. Can’t identify pattern.
Proxy chains use multiple proxies. Each hides previous one. Very stealthy. Also very slow.
Spoofing Headers
Add fake headers to requests. WAF checks these. Real headers look normal. Fake ones suspicious.
Add Referer header. Example: -H “Referer: https://google.com”. Looks like you came from Google. Natural behavior.
Add X-Forwarded-For header. Example: -H “X-Forwarded-For: 192.168.1.1”. Hides real IP. Makes request seem from different location.
Add custom headers. Example: -H “X-Scanner: false”. Silly but works sometimes. Shows you’re not scanning.
Avoiding Pattern Recognition
WAF detects patterns. Same path structure alerts systems. Same file extensions trigger blocks.
Vary request patterns. Mix directory names. Mix file types. Don’t test all /admin* paths together.
Space out similar requests. Test /admin then /api then /upload. Not consecutive admin paths.
Use timeout variation. Different wait times between requests. Natural looking behavior.
FFUF Configuration Files for Stealth
Save stealth settings in configuration file. Reuse for multiple scans. Consistent approach.
Create file called stealth.conf:
url = https://example.com/FUZZ
wordlist = wordlist.txt
threads = 10
delay = 0.5
header = User-Agent: Mozilla/5.0
proxy = http://127.0.0.1:8080
Run with: ffuf -config stealth.conf
Combines all stealth settings. Organized and reusable.
Remember: Authorization is essential. Permission from website owner protects you legally. Stealth techniques complement authorization, not replace it.
Troubleshooting Common Issues
Connection Timeouts and Connectivity Issues
Connection timeouts happen when server doesn’t respond quickly. FFUF waits then gives up. This is normal with slow servers.
Increase timeout value. Use -timeout 30 for 30 seconds. Default is 10. Gives server more time to respond.
Check internet connection first. Open browser. Visit website manually. If site loads, connection works. FFUF issue then.
Firewall might block FFUF. Try different port. Use -p flag with different proxy. Route around firewall.
Server might be down. Try different time. Website maintenance happens. Come back later.
False Positive Management
False positives waste time. Real findings get buried. Managing them improves results.
Run test scan first. Use small wordlist. Note common responses. Look for patterns in false positives.
Apply filters after. Use -fc 404 to hide errors. Use -fs to hide common sizes. Use -fw to hide common word counts.
Test filters on small list. Verify they work. Hide false positives. Show real findings.
Compare multiple scans. Run with different wordlists. See which results appear consistently. Real findings appear multiple times.
Handling WAF-Induced Blocks
WAF blocks aggressive scanning. Server returns 403 Forbidden. Or drops connections. Or shows captcha.
Slow down immediately. Reduce threads to 5. Add delay of 2 seconds. WAF might unblock.
Change user agent. Use -H “User-Agent: Mozilla/5.0”. WAF thinks real browser.
Wait before resuming. Stop scan for 15 minutes. WAF timeout expires. Resume with slower settings.
Use rotating proxy. Changes IP address. WAF can’t track single source.
Dealing with Rate Limiting
Rate limiting restricts requests per second. Server protects itself. Slows down scanning intentionally.
Reduce thread count. Use -t 5 or lower. Fewer simultaneous requests. Stays under limit.
Add delay. Use -d 1 for one second between requests. Spreads requests over time.
Use rate limit flag. Example: -rate 5. Sends exactly 5 requests per second. Controlled pace.
SSL/TLS Certificate Issues
HTTPS sites use certificates. FFUF verifies them by default. Bad certificate stops scan.
Skip certificate verification. Use -k or –insecure. Dangerous but works on test sites.
Check certificate validity. Visit site in browser. See certificate details. Update system certificates if needed.
DNS Resolution Problems
DNS converts domain to IP. Sometimes fails. FFUF can’t connect.
Check DNS manually. Type nslookup example.com. Get IP address. Verify domain resolves.
Use different DNS server. Example: -H “Host: example.com” with IP address. Forces specific DNS.
Restart network. Flush DNS cache. Use ipconfig /flushdns on Windows. sudo dscacheutil -flushcache on Mac.
Test with IP directly. Use https://192.168.1.1/FUZZ instead of domain. Bypasses DNS entirely.
Conclusion
Recap of Key Concepts
FFUF is a powerful tool for finding hidden directories. You learned to install it on Linux, macOS, and Windows. Basic commands and advanced filters make scanning effective.
Wordlists are the foundation. Small lists work for beginners. Large lists find more directories. Choose wisely for your target.
Status codes tell you what exists. 200 means found. 404 means not found. 403 means forbidden. Each code has meaning.
Filtering removes noise. Status code filters work best. Size and word count filters refine results further. Regex patterns catch complex matches.
Stealth techniques keep you undetected. Slow scanning avoids WAF blocks. User agent rotation hides your tools. Authorization remains essential always.
Your Next Steps in Ethical Hacking
Practice on legal targets. Use bug bounty platforms. Try HackerOne, Bugcrowd, or Intigriti. Get real experience safely.
Learn other tools too. Burp Suite complements FFUF. Nikto finds vulnerabilities. Nmap scans networks. Building toolkit takes time.
Study web vulnerabilities. SQL injection, XSS, authentication flaws. FFUF finds entry points. Understanding vulnerabilities helps exploit findings. And the most popular tool to hunt bugs on web applications is Burpsuite.
Join communities. Reddit has cybersecurity forums. Stack Exchange answers questions. GitHub has open discussions. Learn from others.
Building Your Security Career
Start small. Practice consistently. Develop skills gradually. Expertise takes time.
Document findings. Keep notes. Build portfolio. Show potential employers your work.
Get certifications. CEH, OSCP validate skills. Employers respect them. Worth the investment.
Stay ethical always. Never cross legal lines. Reputation matters most. Build it carefully.
Staying Ethical and Legal
Always get written permission. No exceptions. Protects you legally. Protects targets from harm.
Responsible disclosure matters. Find vulnerabilities. Report privately first. Give company time to fix. Then disclose publicly if needed.
Never steal data. Never cause damage. Never access without permission. These rules are absolute.
Help others learn. Share knowledge responsibly. Teach beginners. Build community. Growing security field strengthens everyone.
Your journey with FFUF begins now. Practice regularly. Master the tool. Use it ethically. Make security better for everyone.